PAGES

Tuesday, May 29, 2012

~CROCK POT BREAD BAKING~


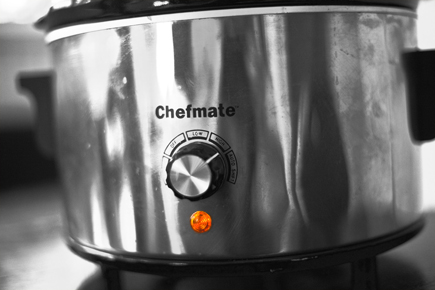
Crock Pot Bread Baking (Fast Bread in a Slow Cooker)


crock pot bread
When I moved to the midwest I was introduced to Crock Pot cooking. I had never even seen a slow cooker before and had no idea the range of foods that could be created in a plug-in cooking pot. Since then I have had everything from No-Peek-Chicken, Swedish Meatballs and Peach cobbler, done in one of these magic devices. When my husband was an art director Aveda they had “crock pot parties,” which meant everyone plugged in their slow cookers at their desks and made a dish to share.  Brilliant! Maybe kids should bring crock pots to school and have healthy food cooking at their desks.
But, bread in a crock pot? Over the years we have gotten requests from readers to develop a method of baking our dough in a crock pot. I had my doubts, lots of them. I didn’t think the slow cooker could get hot enough, I thought it would take too long, I didn’t think it would bake through or have a nice crust and I resisted trying it. I was so convinced it would be a fail. Oh, how wrong I was. The crock pot does indeed get hot enough, and it takes less time than using  your oven, because the rising time is included in the baking. The only thing I got right was the crust, it is very soft and quite pale when it comes out of the slow cooker, but just a few minutes under a broiler and I got a gorgeous loaf. I am a convert and it is just perfect for summer baking when you don’t want to heat up your oven. You could even amaze your friends at work by baking a loaf under your desk!
1 pound of pre-made, refrigerated dough (I used the Peasant Bread on page 46 of Artisan Bread in Five Minutes a Day, but the recipes from Healthy Bread in Five Minutes a Day would also work.)
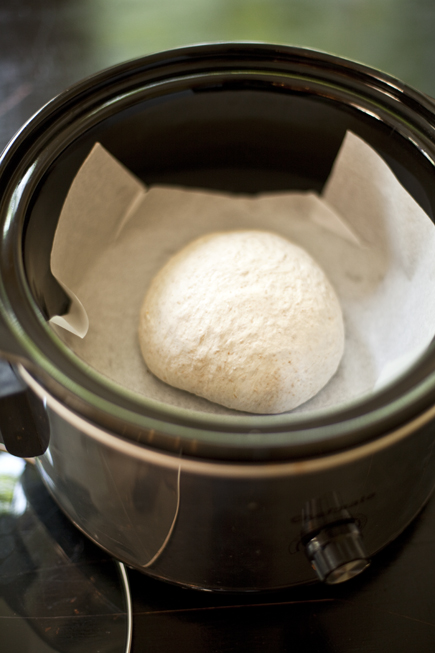
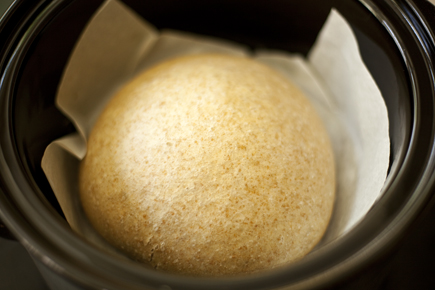
Form the dough into a ball and place it on a sheet of parchment. Lower the dough into the Crock-Pot (Slow Cooker).
Turn the temperature to high and put on the cover. (Not all crock pots behave the same, so you should keep an eye on the loaf after about 45 minutes to make sure it is not over browning on the bottom or not browning at all. You may need to adjust the time according to your machine.)
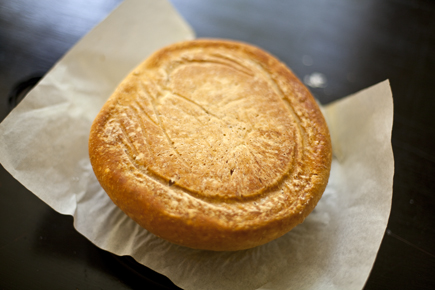
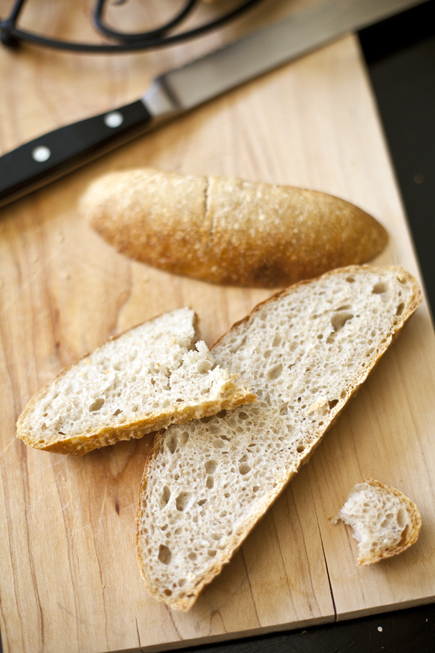
Bake for 1 hour (this will depend on your crock pot, you may need to increase or decrease the time. If you are using a 100% whole grain dough, you may want to go for a bit longer as well). You will have a fully baked loaf of bread, but the crust is very soft, almost like a steamed bun.
The bottom crust should be nice and crisp, but the top of the loaf will be quite soft. Some folks desire a softer crust, so you will love this loaf. If you want a darker or crisper crust…
crock pot bread
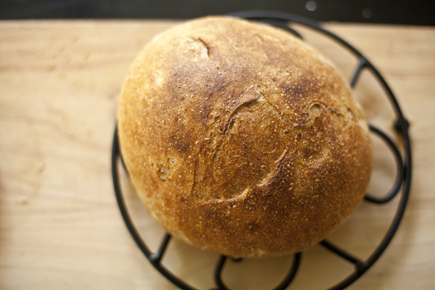
Stick the bread under the broiler for 5 minutes or until it is the color you like, with the rack positioned in the middle of the oven.
Let the loaf cool completely before slicing.
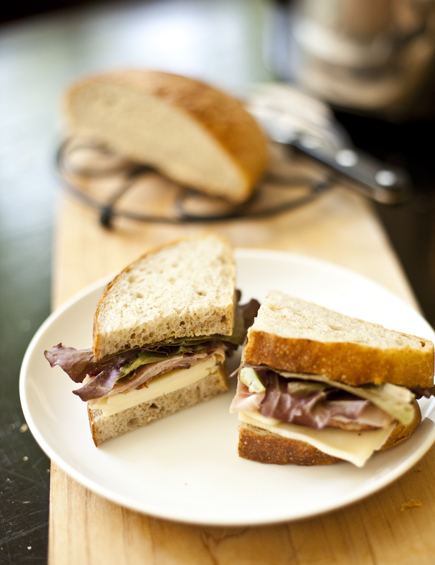
It is fantastic with butter or as a sandwich. I love this method!
Share on stumbleuponShare on facebookShare on twitterShare on diggShare on google_pluson

Thursday, March 1, 2012

Pinterest Recipe ~ I found it!

Ok everyone!  When I began my obsession on Pinterest, pinning and pinning, I came upon a beautiful "pin" that I just had to pin. First it was something "sweet".  I don't eat a lot of them, but...I love to make and look at all pretty desserts.  Then it had hearts!  My love of hearts!  Then it was PINK, oh how I love the color pink.  After pinning it, I had over 2000 re-pins.  Wow!  So many have asked for the recipe for this beautiful looking dessert.  Well, if you're an experienced "pinner" like I am, lol, you would know that to get to the recipe, instructions on how to make what you pin, etc, you would know to click on the picture and what comes up is a larger image of that picture with a link on top of it in the right hand corner.  If you click on that link, it takes you to the site.  Well, this pin only had "uploaded by user" and no link.  I have gotten tons of requests for the recipe for this beautiful work of art.  I found it!!  It is from a blog that I now follow and it is one of my favorite blogs ~ ~ ~


Pistachio and Strawberry Mousse Cake

Pistachio joconde:
  • 2 whole eggs
  • 75 g almond powder
  • 75 g confectioners' sugar
  • 30 g pistachio paste
  • 20 g flour
  • 70 g egg whites
  • 20 g granulated sugar
  • 15 g melted butter
  • Preheat the oven to 400 F
  • Combine the eggs, almond powder, confectioners' sugar, and pistachio paste in a mixer bowl.
  • Beat the mixture for about 10 minutes until it's thick
  • In another bowl, beat the egg whites and granulated sugar until it forms a soft peak, set aside.
  • Sift the flour into the almond mixture and fold well.
  • Add a little bit of the meringue to the almond mixture, fold lightly.
  • Add the melted butter, fold.
  • Finally, add the rest of the meringue in two addition and fold carefully until it is well-combined
  • Divide the batter into two 8" square pan, it'll be thin
  • Bake the cake for about 10 minutes or until the top is slightly brown
Red Berry Jelly
  • 50 g strawberry puree
  • 50 g raspberry puree
  • 75 g sugar (adjust depending on the sweetness of the fruit)
  • 1 tsp. gelatin (bloomed with 1 Tbs. water)
  • Combine the two red berry puree and sugar in a small saucepan and bring it to a gentle boil
  • Melt the gelatin in a microwave for a few seconds, then add it into the puree.
Let cool slightly and pour into 8" square cake ring that has been lined with plastic wrap (for easier removal
Pistachio Bavarian Cream:
  • 2 egg yolks
  • 30 g sugar
  • 20 g pistachio paste
  • 80 g milk
  • 1/8 vanilla bean seeds (or used vanilla pods)
  • 3/4 tsp. gelatin powder (bloomed with about 1 Tbs. of water)
  • 90 g heavy cream
  • Bring the milk and the vanilla bean to a gentle simmer in a small saucepan.
  • Meanwhile, whisk the yolk, sugar, and pistachio paste until thick and pale
  • When the milk is ready, temper the yolk mixture by pouring a little of the milk into the yolk, mix well.
  • Add the rest of the milk in a steady stream while whisking it.
  • Pour the mixture back in a saucepan and put it back on the stove under low heat
  • Bring the mixture to about 82 C, stirring constantly (or until the mixture coats the back of a spoon)
  • Melt the gelatin in a microwave for a few seconds (5-10 seconds), then add it into the milk mixture
  • Run it through a strainer to remove lumps, if any
  • Let cool to room temperature (use icebath to speed up the process)
  • In the meantime, whip the heavy cream until soft peak.
  • When the milk is no longer warm, fold the two together.
  • Pour the mixture on top of the frozen red berry jelly (still in a cake ring), and put it back in the freezer

Strawberry Mousse
  • 325 g strawberry puree
  • 130 g sugar (adjust depending on the sweetness of the strawberry)
  • 1.75 tsp. gelatin (bloomed with approximately 2 Tbs. of water)
  • 240 g heavy cream
  • 25 g granulated sugar
  • Bring the strawberry puree and the sugar to a boil
  • Melt the gelatin in a microwave, and add it to the hot puree
  • Remove from heat and let cool (use icebath to speed up the process)
  • Meanwhile, whip the cream and the sugar until it forms a soft peak.
  • When the strawberry puree is no longer warm, fold the puree with the cream
  • Use immediately
To Assemble:
Grand Marnier/Kirsch/Framboise eau-de-vie/any alcohol of your choice (fruit flavored is preferred)
8” square cake ring with 1.75”-2” high
  • Put one layer of pistachio joconde in the bottom of an 8” square cake ring
  • Moistened with enough alcohol (you can also mix the alcohol with simple syrup if you want). Don’t over-soak it as you don’t want the cake to taste like alcohol
  • Spread a thin layer of strawberry mousse on top of the joconde, then put the frozen pistachio cream/red berry jelly on top with the pistachio cream on top.
  • Spread another thin layer of strawberry mousse on top
  • Layer the other pistachio joconde, brush with alcohol
  • Pour the remaining strawberry mousse, and level the top with a metal spatula
  • Put the whole thing (with the cake ring intact) in a freezer and leave it overnight
  • When it’s completely frozen, warm the cake ring either with a blow dryer or a torch and remove the ring from the cake
  • With a hot knife, cut the cake into rectangles, wiping the knife before another cut.
  • Decorate
Decoration:
  • Red berry jelly
  • Pink heart macaron
  • Halved pistachio pieces
  • Fresh strawberry
  • ENJOY!!!

Thursday, January 19, 2012

Gatherings ~

I get so excited when I find something that I just love.  I get a feeling inside me when I read and look at the pictures too.  It's the beauty in "eye candy" that makes me all happy inside.  Here is an on line magazine that is free to look at and read.  http://www.heatherspriggs.com/gatherings-magazine/


Refresh your palette and start the New Year with the inagural White Issue of Gatherings Magazine! Indulge your senses with an inspired creative living publication featuring articles on crafts, food, interiors, style, and vintage collecting. Gatherings offers a collection of ideas for home and heart.  Click on the link above and you will go to the site and can look at and read the entire magazine. ~


Tuesday, January 10, 2012

Swedish Sandwich Cake


SmörgÃ¥stÃ¥rta `(in Swedish) ("sandwich cake") is a Scandinavian cuisine dish that is popular in Finland, Sweden and Estonia. This salty cake is compositionally similar to a sandwich, but it has such a large amount of filling that it more resembles a layered cream cake with garnished top.
The smörgÃ¥stÃ¥rta is normally made up of several layers of white or light rye bread with creamy fillings in between. The fillings and toppings vary, but egg and mayonnaise are often the base, additional filling may vary greatly but often includes one or more of the following: liver pate, olives, shrimp, ham, various cold cuts, caviar, tomato, cucumber, cheese and smoked salmon.  It seems to stay together well when slicing.
SmörgÃ¥stÃ¥rta is served cold and sliced like a dessert cake. e types of sandwich cakes vary from meat, fish, combinations of cheeses and meats to vegan. The smörrebröd top decor often reflects the ingredients used as a filling. Voileipäkakku (in Finnish) is part of family gathering dishes from birthday parties, weddings or funerals in Finland.

The Swedish savoury sandwich cake (smörgÃ¥stÃ¥rta) is very common at parties and celebrations. Especially since it’s beautiful and tastes best if it’s prepared one day in advance and then decorated on the serving day. The layered cake is very rich with fillings stuffed with goodies of your choice spread on crustless toast bread. The bottom consists of crustless toast bread. The first filling consists of mayonnaise, crème fraîche, asparagus, boiled eggs and tuna. Then there’s crustless toast bread again. The second filling consists of mayonnaise, asparagus, boiled eggs, mushrooms and shrimps. Then there’s crustless toast bread again. Finally there’s the decoration with cucumber, roe, cray fish tails, shrimps, mayonnaise and salad. Delicious!


The start of a Swedish Sandwich Cake
Such a beautiful presentation and color on this one


A Vegetable Sandwich Cake
You can find the recipe for this beautiful one at: http://annesfood.blogspot.com/2007/05/swedish-sandwich-cake-by-lena.html
Here are a few more pictures of Swedish Sandwich Cakes.  I found these images without recipes.  If you use the basics there are endless possibilities to make some beautiful, tasty Swedish Sandwich Cakes.


Tuesday, December 6, 2011

~ Christmas Soiree ~

The First Christmas Soiree from thestrawberrypatchjunk.blogspot.com/ ~~~


These are becoming my "famous" Homemade Tortilla Chips, Spinach, Tomato, Jalepeno Cheddar, Sweet Onion and Thai, along with my Homemade Peach and Corn Salsas.


Then there are my Soups.  These are dried and all you have to do is either add water or milk.  Black Bean, Cajun Bean, Broccoli Cheddar, Creamy Potato Leek, Cheesy Bacon Potato, Chicken Noodle with Vegetables, Creamy Chicken Noodle.


I always do samples when I do my shows.  I think that people are interested in how they taste before they buy.  Also, when they taste, they like them all!


 At this event, I did some Christmas cookies, not a lot, but enough that people enjoyed them.  White Chocolate with Raspberry filling, Sugar Cookie Pinwheels, Snowballs and large Chocolate Chip Cookies.


I have started incorporated my Everyday Gourmet "Home Collection" into my Everyday Gourmet.  An assortment of Party Picks, Magnets, Fun Tape.

~Pretty Vintage Tin Cans~
~Fun Christmas Grab Bags~
~Paper Straws~
~Party Favor Bags~
~Red Pom Pom Party Picks~
~An assortment of magnets for the fridge~

So, there it is!